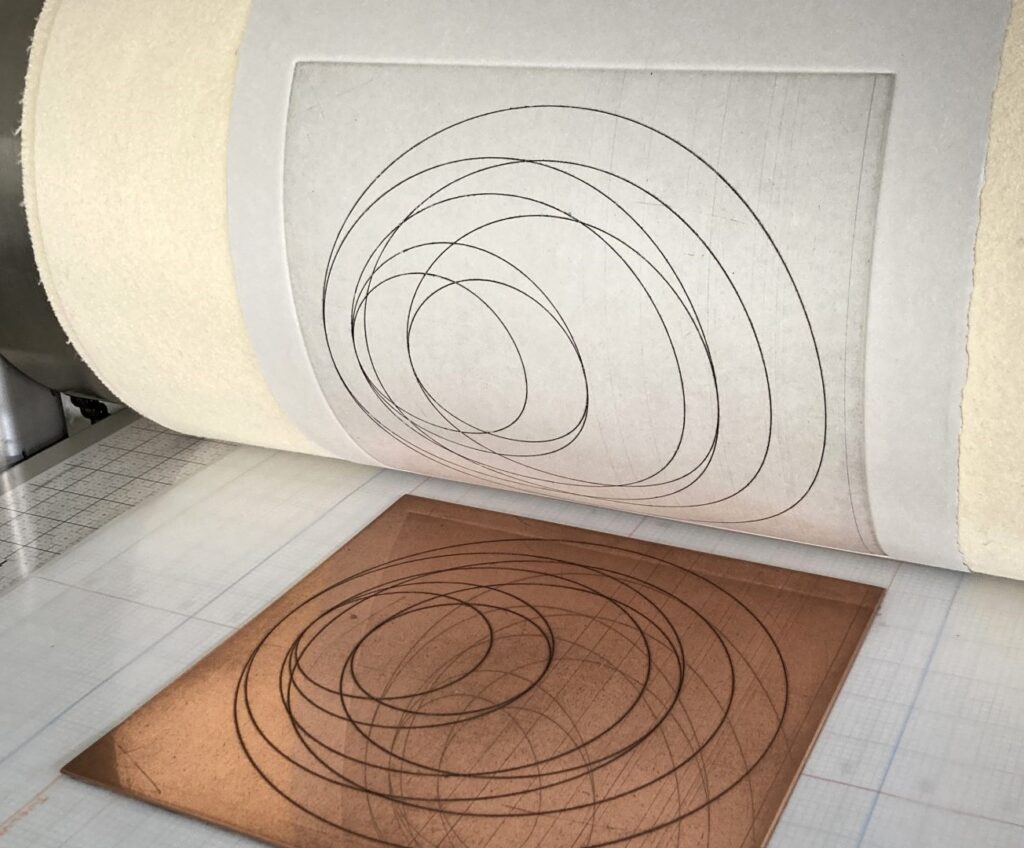
Intaglio Printing
The intaglio printmaking process represents a remarkable fusion of technical precision and creative expression. This traditional printing technique has evolved over time, offering artists a versatile means to transfer their vision and creative expression onto paper.
Intaglio printing techniques trace their roots back to the 15th century. The history of intaglio printing is a remarkable journey through time, marked by the artistic brilliance of countless masters. From the origins of intaglio techniques in the Middle Ages to its innovations in the Renaissance, intaglio techniques have left a creative mark on the artistic world. The enduring appeal of intaglio printmaking lies not only in their historical significance but also in their ability to create prints of unparalleled detail, depth, and emotional aspects. Intaglio techniques, this timeless art form, remain an integral part of the vibrant world of printmaking.
The art of intaglio techniques continued to evolve over the centuries, with various techniques and innovations enhancing its capabilities. German and Italian artists played important roles in developing the techniques that would become the foundation of intaglio printing.
In the early days, artists created intaglio prints using engraved metal plates, primarily copper, as the printing surface. Artists etched their designs into these plates, creating incised lines that would hold ink for the printing process.
Intaglio Printing Process
Here’s a brief guide to the key steps what is the characteristic of intaglio printing involved in creating intaglio prints:
Preparing the Plate: The process begins with a metal plate, normally copper, zinc, or steel. To create a smooth, even surface, one must clean and polish the plate.
Incising the Image: The artist uses various tools, such as engraving needles or etching needles, to incise or carve the image into the plate. Artists use various techniques, including engraving, dry point, etching, and aquatint, to create distinct textures and line qualities.
Inking the Plate: After incising the plate, apply ink to its surface. Then, wipe away the excess ink, leaving ink only in the incised lines and grooves.
Printing the Image: “The printing press or etching press runs the dampened paper placed on top of the inked plate. “The pressure applied forces the paper into the incised lines, transferring the ink onto the paper. You can repeat this process multiple times to create editions of the print.
Drying and Editioning: After pulling the intaglio print, we carefully dry and inspect it. Artists often create limited editions of their prints, numbering and signing each one to ensure their authenticity.

Plate Preparation for Intaglio Prints
In the intaglio printing process, artists use two different methods, hard ground and soft ground, to prepare the metal plate before creating incised lines and textures. These methods involve preparing the plate to resist etching or engraving, enabling artists to achieve various effects in their intaglio prints.
Hard Ground
Composition: Hard ground is a mixture of beeswax, asphaltum (a naturally occurring tar-like substance), and resin. “It earns the label ‘hard’ because once applied and allowed to cool, it solidifies and becomes relatively firm”.
Application: To apply hard ground, you typically melt the mixture and then spread it evenly over the cleaned and polished metal plate using a brush or roller.
Soft Ground
Composition: Soft ground, as the name suggests, remains relatively soft compared to hard ground. It consists of beeswax mixed with a small amount of asphaltum, which prevents it from hardening completely.
Application: To apply soft ground, you roll it evenly onto the plate, just like hard ground.
Intaglio Techniques
Etching
A metal plate is coated with an acid-resistant ground. The artist then uses an etching needle or other tools to draw through the ground, exposing the metal. The plate is then immersed in an acid bath, which bites into the exposed metal, creating lines and textures. Etching allows for a wide range of line qualities and textures. It’s known for its tonal gradations and atmospheric effects, making it versatile for creating both fine details and broader areas of shading.
Aquatint
Aquatint is a technique of intaglio printmaking for achieving tonal values rather than lines. A fine resin dust (aquatint powder) is applied to the plate’s surface and then heated. The plate is etched in an acid bath, creating a multitude of tiny dots or pits that hold ink. Aquatint is known for its subtle gradients and a wide range of tones, making it suitable for reproducing multiple shades in prints.
Drypoint
Drypoint involves incising lines directly into the metal or acrylic plate using a hard-pointed needle or other sharp tools. The pressure of the tool creates burrs of displaced metal along the incised lines. Drypoint lines have a characteristic burr, which holds ink and produces a rich, velvety line quality. It’s majorly known for its expressive and often bold marks.
Mezzotint
Mezzotint is a labour-intensive technique where the entire plate is roughened using a tool called a rocker. The artist then scrapes or burnishes areas to create gradations of light and shadow. The mezzotint has rich, velvety blacks and smooth tonal transitions, making it ideal for creating atmospheric and dramatic effects.
Engraving
Engraving involves using a sharp, pointed tool called a burin to incise lines directly into the metal plate. The burin is pushed through the plate’s surface to create precise, clean lines. It produces fine, controlled lines with sharp edges, making it ideal for details and shading.
Each intaglio printmaking technique offers artists distinct possibilities for mark-making, texture, and tonal variation, allowing for a wide range of creative expression in printmaking.